Coax out your child’s inner Sir Bradley Wiggins in 30 minutes or less by following Isla Rowntree’s proven methods…
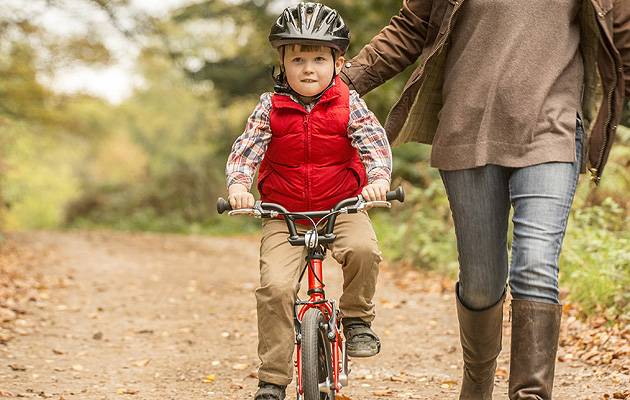
It’s a magical moment, when your gleeful little one masters how to ride a bike. The sight of them grinning while clumsily peddling away from your grip, little legs wheeling excitedly, can’t fail to trigger a parental pride. Next stop: Tour de France?
The journey to that point of elation, however, is not always so smooth. The process of learning to cycle doesn’t need to be fraught with frustration and danger, though; follow in the wheel marks of Isla Rowntree’s methodology and you can quickly teach your child how to ride safely – in as little time as 30 minutes.
Rowntree, a former British national champion medal winner in various disciplines (from cyclo cross to grass tracking, and most in between), has devised a simple guide to help children (aged two and upwards) master riding … and rapidly.
Here are Rowntree’s eight tips to put you on the right path to cycling success:
1. DITCH THE STABILISERS
For decades children’s bikes have come fitted with stabilisers, but using them is actually detrimental to the learning process, contests Rowntree, co-founder of Islabikes – a popular nine-year-old company which distributes an impressive range of development bikes (from aged two to adult) all over the globe.
“If you fit stabilisers to a bike it becomes a tricycle – that is, something that can’t lean, as you need to do with a bicycle,” says Rowntree. “On a bike you steer by turning the handle bars, moving your body weight but leaving the thing upright to stop it toppling over the other way. When you fit stabilisers it is completely different; you learn to pedal and don’t learn to balance and steer at all. The problems arise when you take the stabilisers away, because you have to completely relearn what you’ve been doing, and that’s actually harder than just learning to do it correctly in the first place.
“We encourage parents to avoid stabilisers as they prevent children from learning to balance naturally and actually make the process of learning to ride a bike trickier. Far better is to let your child use a balance bike – which will teach them the basics of balancing on two wheels and make the transition to first pedal much easier – before trying a pedal bike.”
2. DON’T BE PUSHY
Most children develop the requisite cognitive skills to ride a pedal bike unaided between the ages of 3½ and 4½, continues Rowntree. There are exceptions, of course, but one important thing to note is that you mustn’t push your child in to cycling – doing so could halt and even stop progress. They will be ready for it in their own time, at their own pace.
“Children develop their cycling skills at different times,” she says. “If it seems that your child isn’t quite getting the hang of it, don’t worry. If they have a balance bike – which we recommend to use from the age of two – let them keep enjoying it for a few weeks longer before trying again.
“You do have to wait for the appropriate time. When they’ve developed the coordination potential to learn to ride – which, like everything else, happens at different ages – it should be fairly straightforward to ride unaided.
“Prior to that development happening it doesn’t matter how good they are at scooting and balancing they’re not going to be able to actually ride a bicycle with pedals.
“It’s really vital to stress not to get in to a pressure situation as a parent. Children are so sensitive and we all know this but we’re desperate for our own kids to advance to the next stage of their development. Children can pick up on that pressure, that desire of the parent, and it can leave them feeling uncomfortable. Learning to cycle should be a pleasant experience, not a confidence-bruising one.”
3. SPACE (BUT NOT GRASS) IS THE PLACE
When the right time to teach your little bundle of joy how to cycle arrives, “find a large, safe, flat open space to use as your learning zone,” continues Rowntree. “An empty playground, something with tarmac, or a fairly-firm surface is perfect. Long grass is too tricky for new riders to pedal on.
“Make sure you adjust the height of your child’s saddle so they can get the balls of their feet on the floor.”
What about head protection? “I would leave the helmet decision up to the individual parent,” says Rowntree. “If you’re going to use a helmet it is absolutely vital that it’s adjusted and fitted correctly.”
4. POWER OF THE ARMPIT (GRIP)
The next step, Rowntree says, is to “put your child on their bike and stand behind them, holding them under their armpits. Don’t hold any part of the bike. We want the new rider to feel how their bike naturally moves underneath them. You should loosely hold the child and push them along, obviously ensuring that they don’t topple over.
“If they’re not ready their feet will flail off the pedals, so they’ll pedal half a revolution forward, half a rev backwards, another half a rev forwards and then their feet will fall off the pedals. If you try that for a few minutes and they’re still flailing, they’re probably not ready yet – again, it’s best just to wait four to six weeks and try them again.”
5. BALANCING ACT
“Push your child along and let the bike wander in any direction,” continues Rowntree. “You can help steer the bike by leaning your child right and left; doing this will let them learn that leaning is part of the steering process. If your children has learnt to balance (perhaps on a balance bike) they may take a little while to grasp the concept of forward pedalling, but it shouldn’t take long – some, amazingly, get it almost immediately.
“Words of encouragement will help them while they practise pedalling forwards. If your child is ready to cycle unaided they should quickly get a feel for balance and you can gradually let go, but stay close by to catch them if anything goes wrong.
“The balance bike is the perfect way of introducing a child to two wheels because it separates the learning to balance from the learning to pedal and you can actually learn to balance at a much earlier age than you can probably learn to coordinate pedalling.
“With a balance bike the riders have both feet on the ground so they can gradually develop their waddling into striding, and then more confident striding before you get little gaps in the feet being on the ground and that’s where the balancing starts to come and eventually they’ll have their feet up, scooting and even free wheeling.”
6. BE PATIENT
For nervous riders, you may need to stay with them a bit longer, warns Rowntree. “Just let them know that you’re there, but you’re very gradually going to loosen your hold on them,” she says. “Eventually they’ll be cycling unaided without even knowing it. The look of delight when they realise you’re no longer holding them and they’re cycling all by themselves is a moment to treasure.
“Once you’re going along with them you’ll feel when they’re cycling and you can just gradually loosen the hold, but stay with them and have your hands hovering in position until they gain more confidence. It’s a gradual transition; you’re not just suddenly letting them go and leaving them unaided, and you can feel it. As a parent you can feel when they’re managing fine.”
7. TIME TO RIDE
The actual going part is the easiest to teach, but there are two significant other elements to riding a bike: namely starting and stopping.
“Once they’re pedalling and balancing on their own and you’re running along beside them, don’t abandon them, because you’re going to teach them afterwards how to start and stop,” continues Rowntree. “It’s too much information to teach your child how to start and or stop first of all.
“To learn how to set off from stationary unaided have your child put one of their pedals just past the top most part of the pedal circle. That means around the ‘55-minute’ mark, as if you were looking at is as a clock face, using the left foot and five past, with the right. Now ask them to give a good push on this leg.
“Make sure they are looking forward – they’ll want to look at their foot and that doesn’t help them balance. With enough forward momentum they should be able to transfer both feet to the pedals, start pedalling and be a completely independent rider.”
8. TAKE A BRAKE
The last point – and most crucial, in terms of safety – is to teach your little one how to stop. “Quite often I ask children to walk with the bike and practice using the brakes before they actually learn to do it while they’re riding,” adds Rowntree, “because they’ll tend to grab the brakes really hard. That produces a very sudden stop when they need to obviously learn to brake in a graduated way.
“When they are in the saddle, quite often the first couple of stops will be very abrupt, not giving them time to get their feet beneath them. Being there as a parent to catch while they just develop that more gentle coordination is useful.
“It is a fantastic, special moment when any child reaches the milestone of riding unaided for the first time, even for us at Islabikes, despite the fact that we see it all the time.”
For more information about balance bikes, Isla Rowntree and her company go to Islabikes.co.uk


